365 Entra Export Overview
How to Activate 365 Entra Export Services
Registering the Application
-
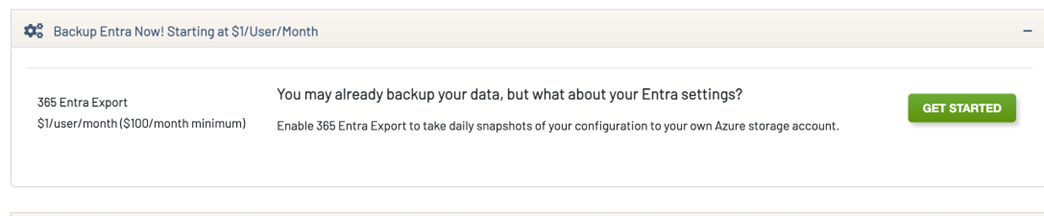
Click on “Get Started” under “Backup Entra Now” within the 360 Visibility portal.

-
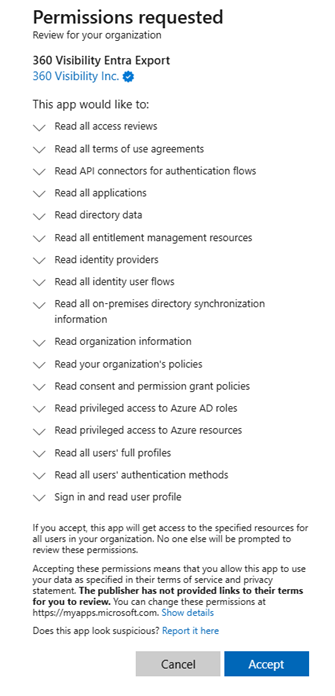
Click on “Accept” to grant the 360 Visibility Entra Export application the appropriate permissions in your tenant.

Setup Azure Storage Account
-
Now that you have the application registered, you need to connect it to a storage account where the exports will be stored. If you already have a storage account you wish to use, then skip to Step 6. Otherwise, proceed with creating the storage account in the Azure Portal (https://portal.azure.com)
-
Click on “Create” under “Storage accounts” on Azure.

-
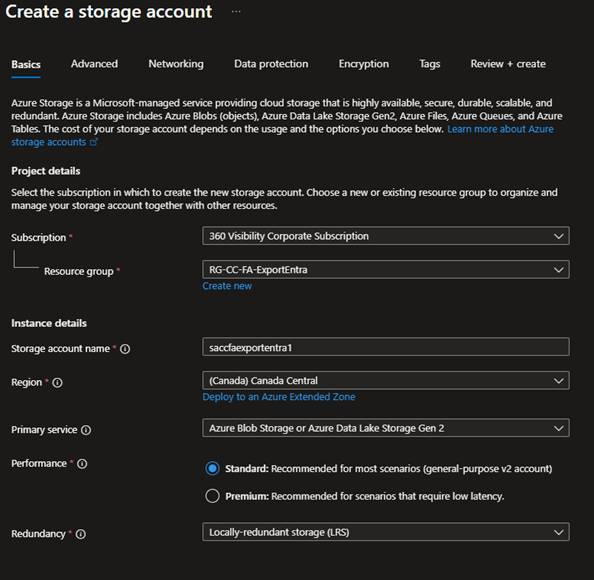
Pick the appropriate resource group and name for the storage account, as well as the region.
-
Select “Azure Blob Storage or Azure Data Lake Storage Gen 2” as the primary service, “Standard” as the performance, and “Locally-redundant storage (LRS)” as the redundancy:

-
Keep the default settings for everything else and hit “Review + create”
-
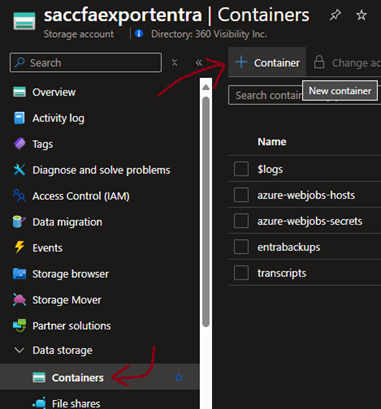
Click on “Containers” and then “+ Container”

-
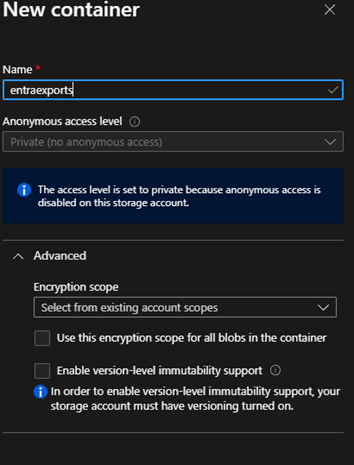
Choose name such as “entraexports” and keep the default settings and hit Create:

-
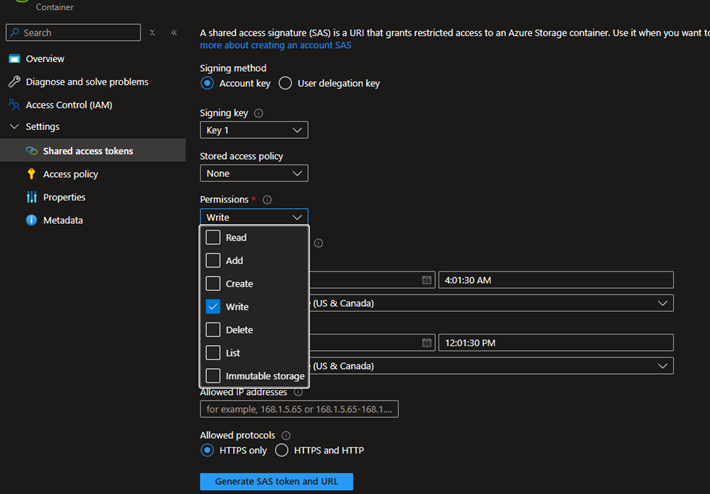
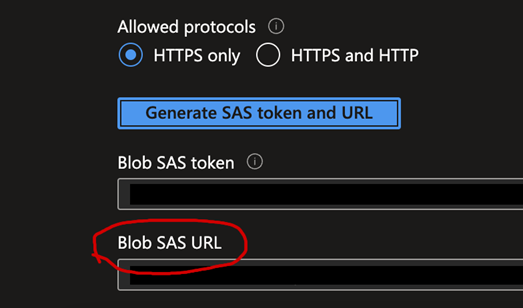
Go into the newly created container and click on “Shared Access Tokens”. Make a new SAS token with the following permissions only:

- Choose the expiry date for the SAS token.
NOTE: MAKE SURE TO REMEMBER THIS DATE. Once the token expires, the exports will no longer be able to be uploaded to the Azure storage account. - Click on “Generate SAS token and URL” and copy the Blob SAS URL:

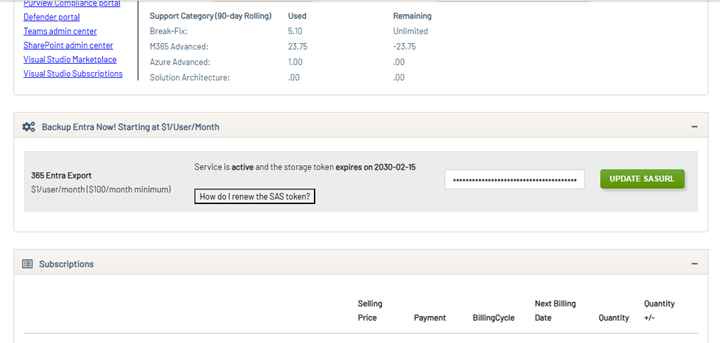
- Go to https://my360.360visibility.com/ and submit the SAS URL you just copied to the “365 Entra Export” section and hit “Update SASURL”