360 Canadian EFT Support Overview
Eliminate check signing and expensive wire transfers
Use 360 Canadian EFT for Business Central to quickly and effortlessly setup EFT with any major Canadian Bank. Leverage the time and cost savings of using EFT for Payables, configured in a matter of minutes.
- Speed up the payment process by eliminating manual payments and cheques (checks)
- Pre-configured EFT file formats for major Canadian Banks
- Secure, convenient, and cost-effective Electronic Fund Transfer
Prerequisites
-
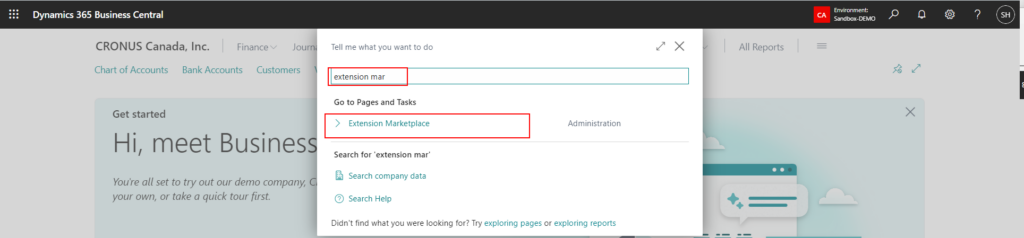
Launch Extension Marketplace from Business Central Search.
-
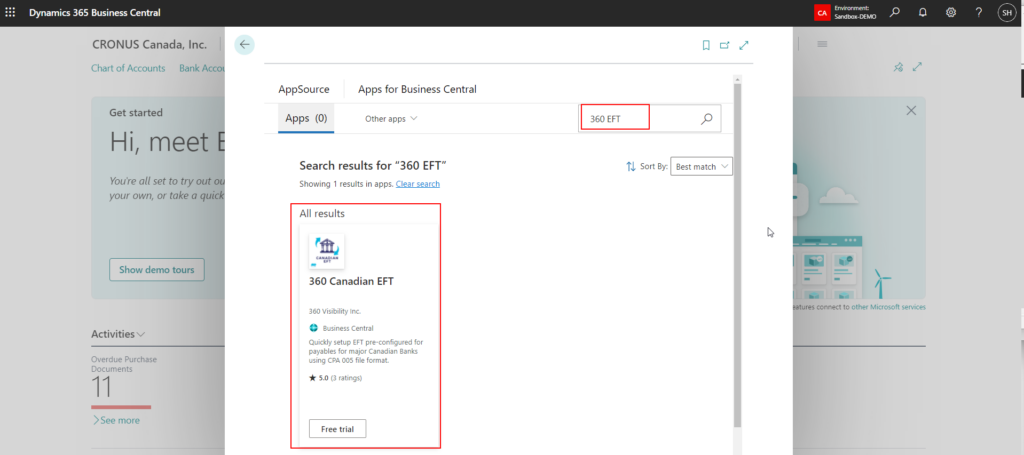
When the AppSource page opens search for 360 EFT and select 360 Canadian EFT.
-
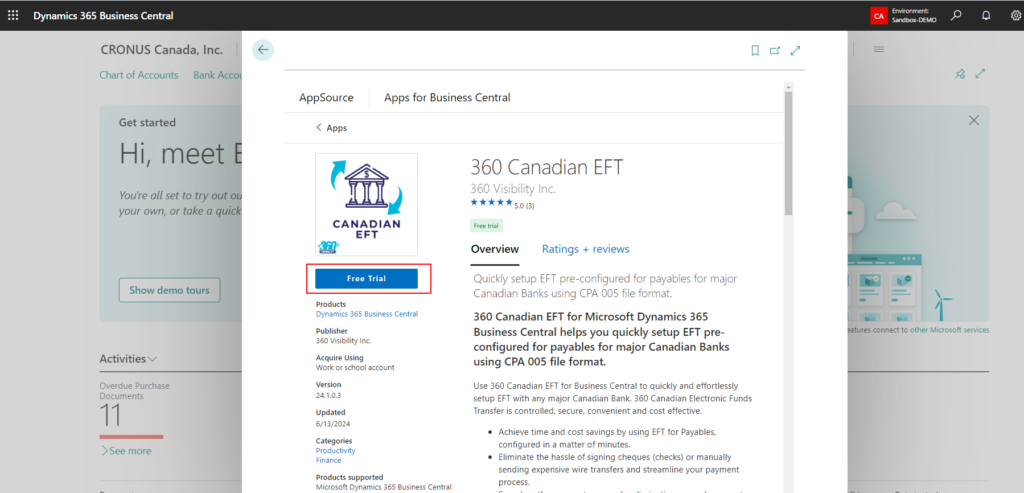
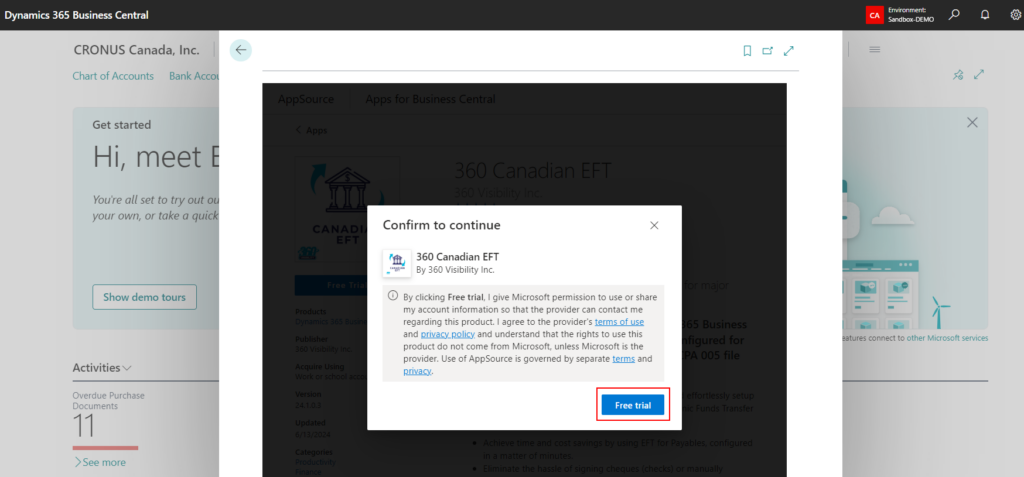
On the 360 Canadian EFT app, click on FREE TRIAL
-
Click on Free Trial again to continue
-
Choose the Language and click on Install to continue to start App installation in Business Central.

-
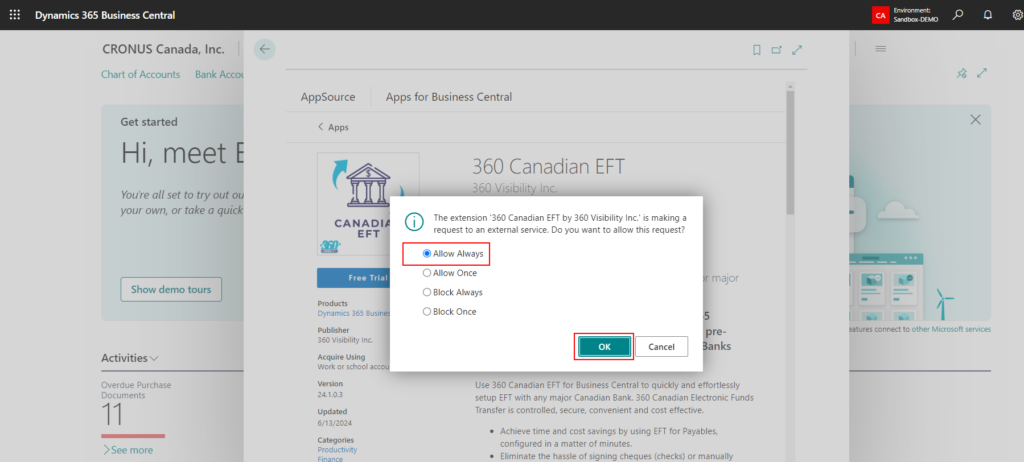
If the following screen prompts, choose “Allow Always” and click OK to continue installation.
-
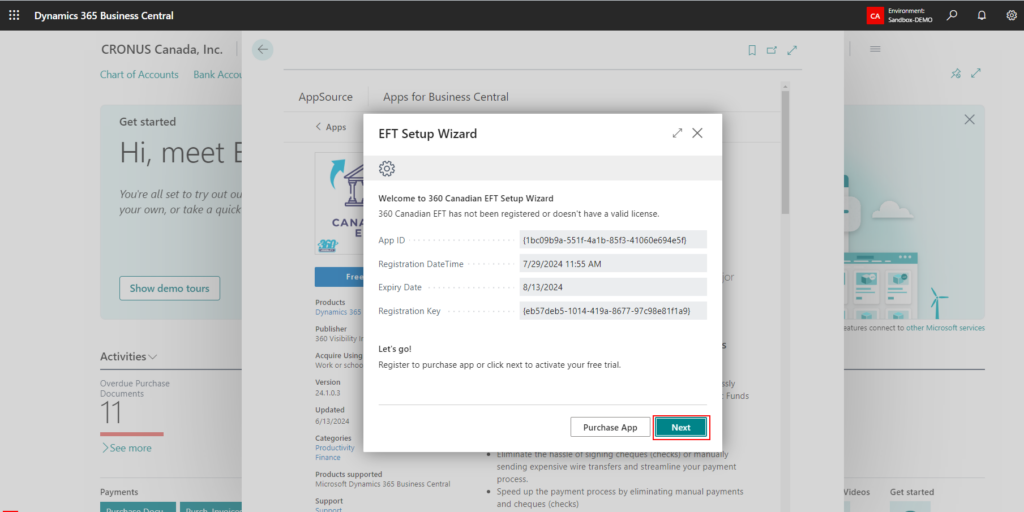
Once you click OK, you may need a few minutes to wait for installation. Once installed, 360 Canadian EFT Setup Wizard will appear, click “Next” to complete the Installation. Or “Purchase App” to setup the subscription.
-
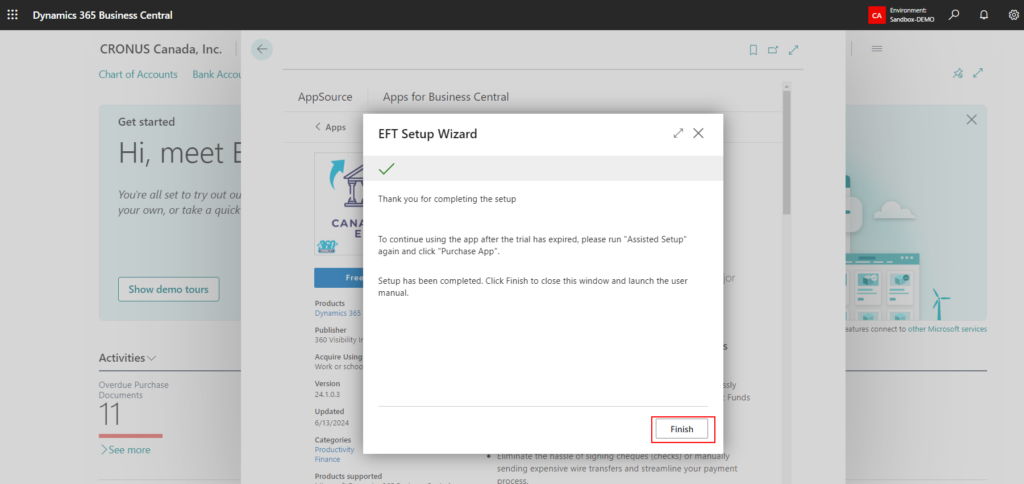
Click on “Finish” to complete the installation.
Setup
(Required) Data Exchange Definition File Download
After the successful installation and registration of the App, you need to import the Data Exchange Definition files as described below:
- Go to Data Exchange Definition.
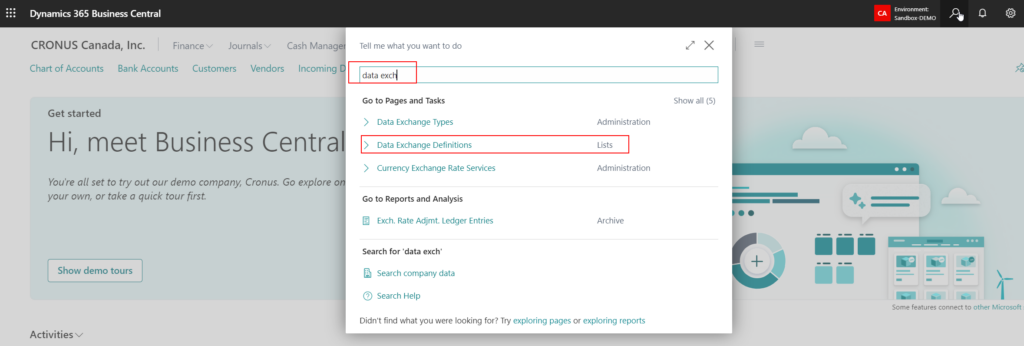
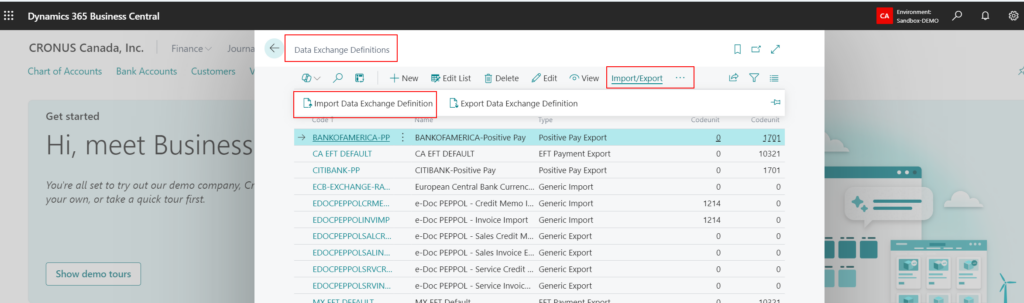
- On the Data Exchange List, click on “Import/Export” -> “Import Data Exchange Definition”.
-
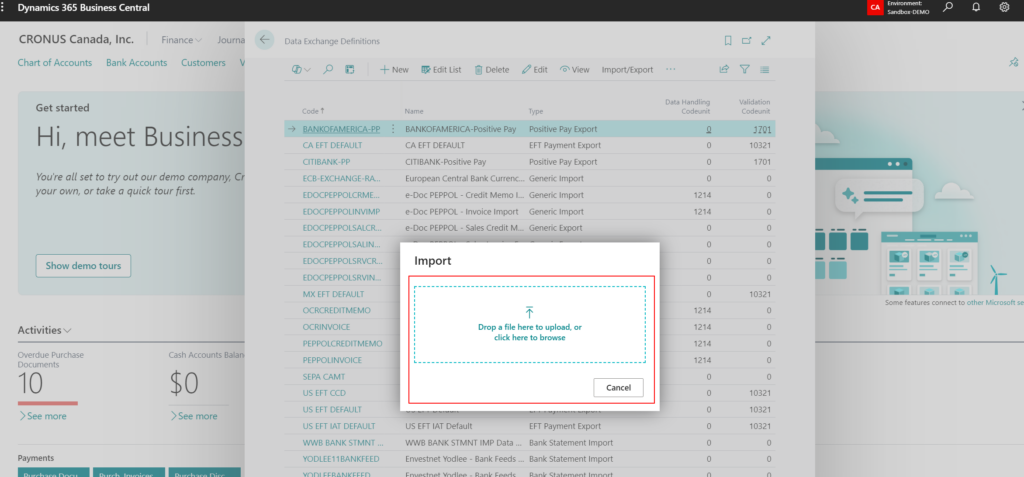
Browse and select the definition file (or drag and drop) to import from the unzipped file (ex. RBC – CPA005.txt)
- Verify that Data Exchange Definition is created successfully.
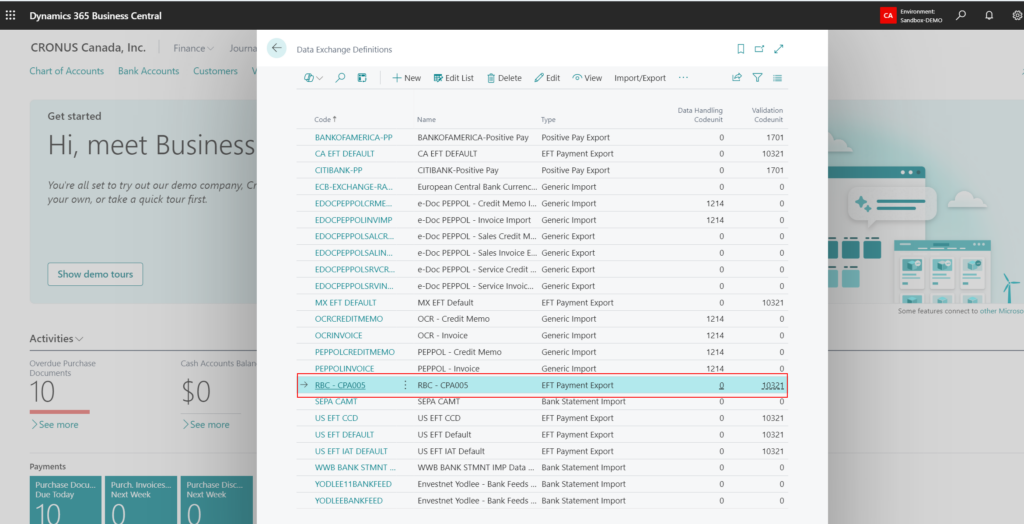
Note: Follow steps 1 to 4 to import the required Data Exchange Definition for all the required banks and ensure that the Type is set to EFT Payment, in case it defaults to Generic Export.
-
- Now, go to “Bank Export/Import Setup”.
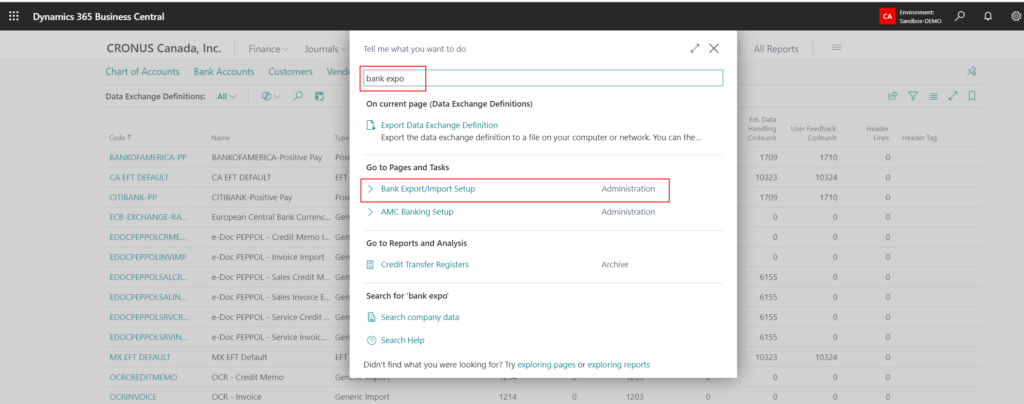
- On the “Bank Export/Import Setup”, click new and create new record with the following fields.
- Code
- Name
- Direction (select “Export EFT” from dropdown)
- Data Exch. Def. Code (select the desired Data Exchange Definition Code)

- Setup/verify the following configurations.
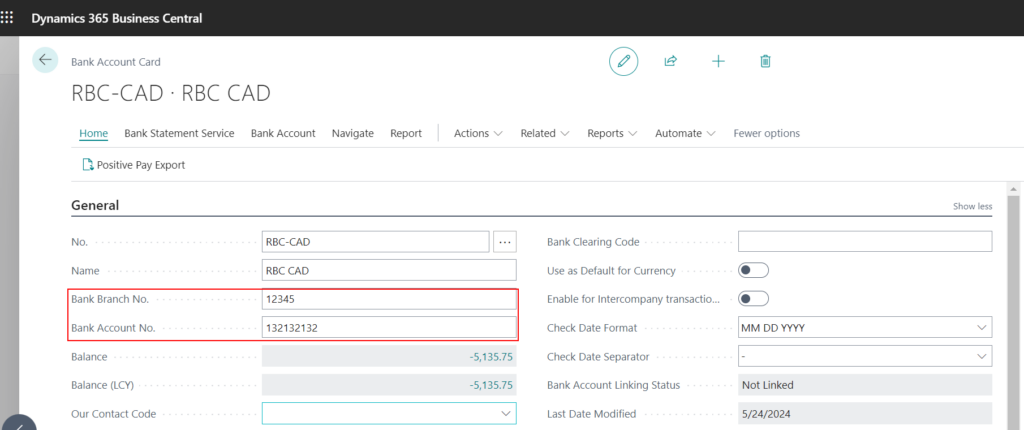
- On the Bank Account Card:
- Bank Branch No. is filled in.
- Bank Account No. is filled in.
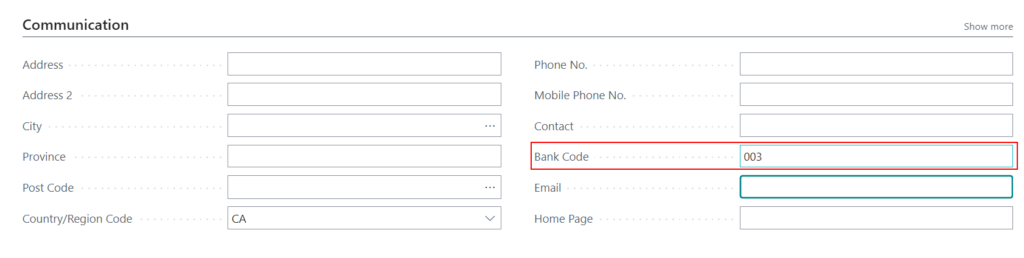
- Bank Code. is filled in.
- A document no series in entered in the “Last Remittance Advice No.”
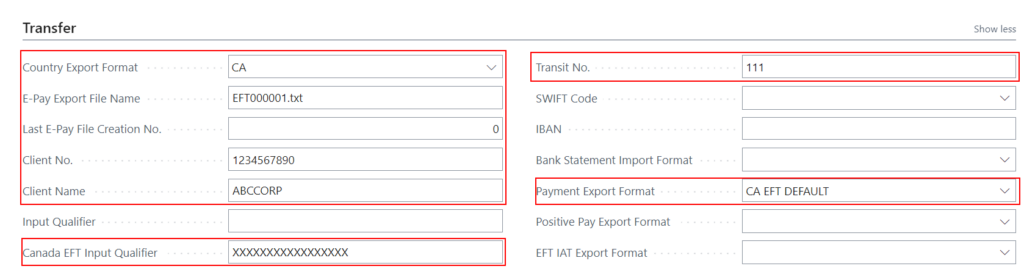
- Country Export Format is set to “CA”.
- A document no series in entered in the “E-Pay Export No.” field.
- “Last E-Pay File Creation No.” field is set to the appropriate no.
- The Client No. is filled in.
- The Client Name is filled in.
- Canada EFT Input Qualifies is filled in. (please note that this is only required for some banks)
- The Transit No. is filled in. This is as same as the Bank Account No.
- Payment Export Format is set to the desired “Bank Export/Import Setup Code”.
- On the Bank Account Card:
- Now, go to “Bank Export/Import Setup”.

-
-
- On the Vendor Bank Account:
-
Ensure that the following fields are updated:
-
-
-
- No.
- Name.
- Country/Region Code (should be CA).
- Bank Code.
- Bank Branch No.
- Bank Account No.
- Transit No. (same as the Bank Branch No.)
- Use for Electronic Pay
-
-

-
-
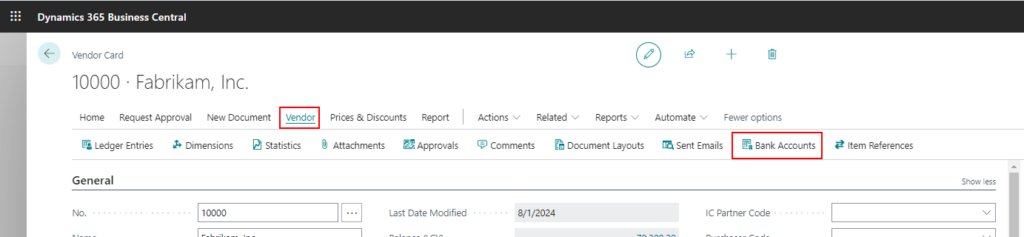
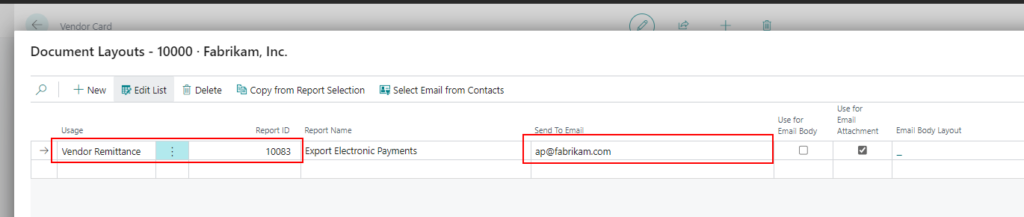
- On the Vendor Card, Document Layout
-
Setup the following fields:
-
-
-
- Usage: Vendor Remittance
- Report ID: 10083
- Send to Email: specify the vendors email to send remittances
-
-

-
-
- On the Vendor Card, select the default Vendor Bank account on the Preferred Bank Account field.
-

-
-
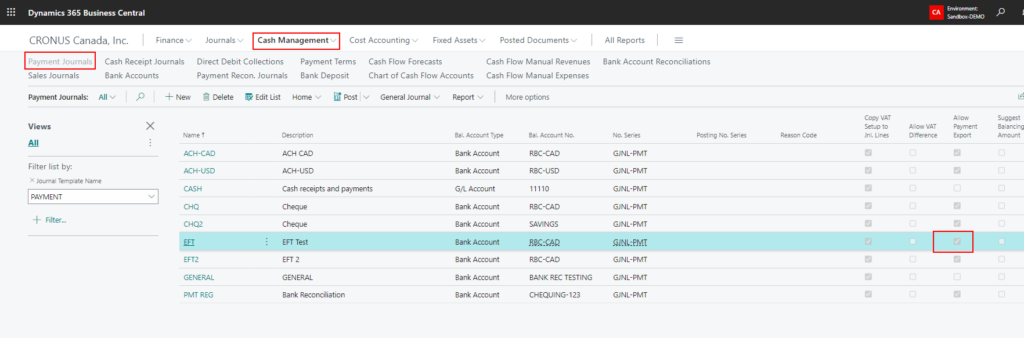
- On the Payment Journals page, select the Boolean “Allow Payment Export” on the batch which will be used to enter EFT Payment.
-
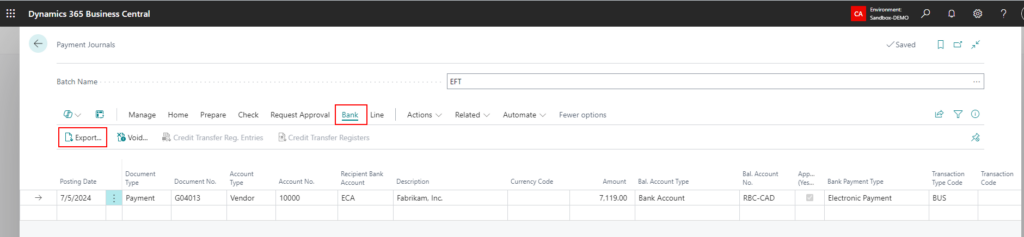
Create an EFT Payment
- After entering payment line in the payment journal, ensure that that following fields are populated correctly.
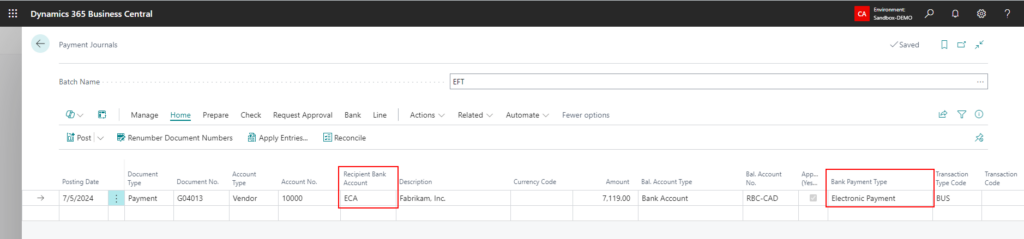
- “Recipient Bank Account” field is populated with the Vendor’s Bank Account.
- “Bank Payment Type” field is set to “Electronic Payment”.
- Go to -> Bank -> Export
- On the Edit-Export Electronic Payment page, select/verify the Bank account No. and the Output Method and click OK
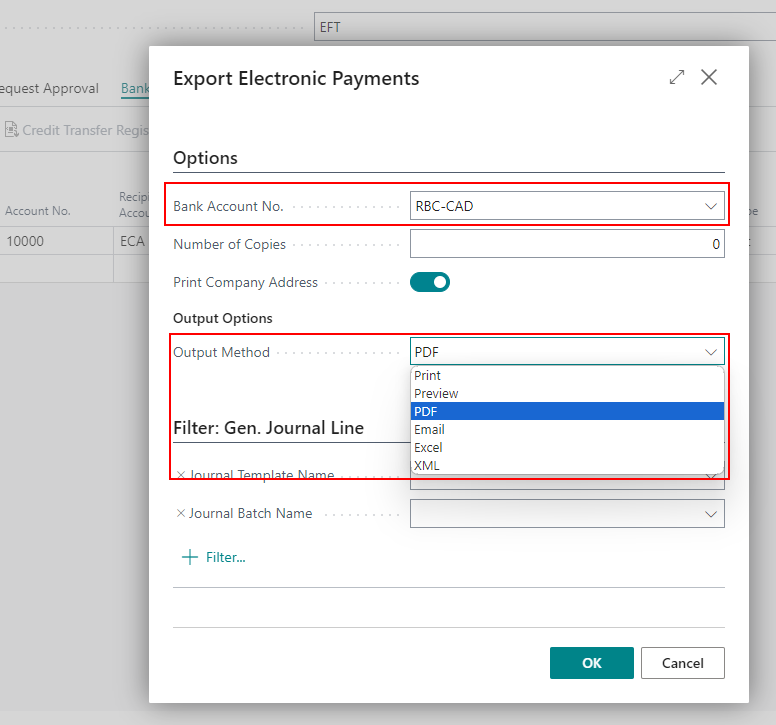
- This will produce the Remittance Advice

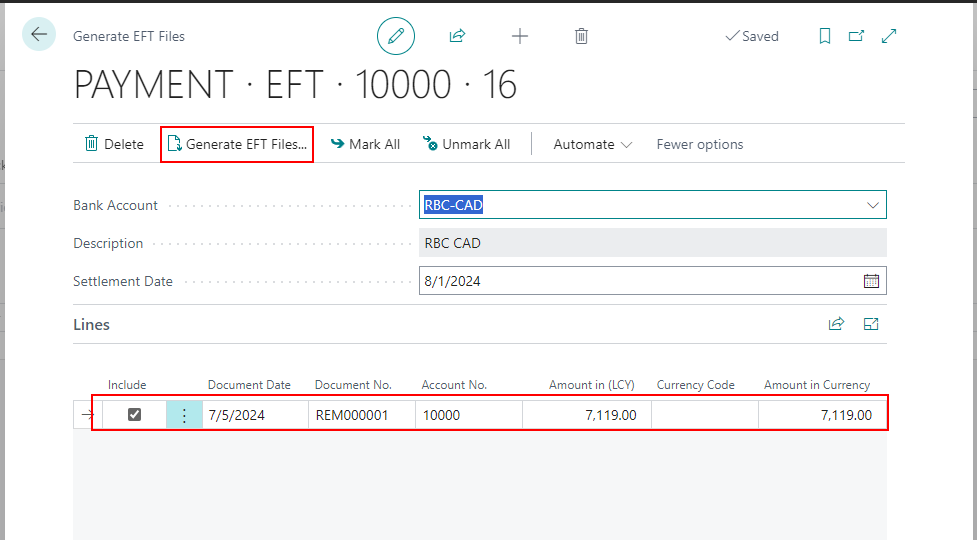
- Go to Action -> Functions -> Generate EFT File

- Verify the details and click on “Generate EFT Files” to create the file