Step by Step Guide on How to Monitor and Track Changes to Important Fields in Dynamics 365 Business Central
This post will show how to set up and monitor changes to important fields in Business Central. In this example, we will demonstrate how to get notified when the “Name” or the “Credit Limit” fields get changed on the Customer Card.
- On the search box, type “field monitoring” and select the “Field Monitoring Setup” feature from the suggestions.

- On the Field Monitoring Setup Page, select the “Notification Recipient” and the Notification Email Account. Then click on the “Start” button.m

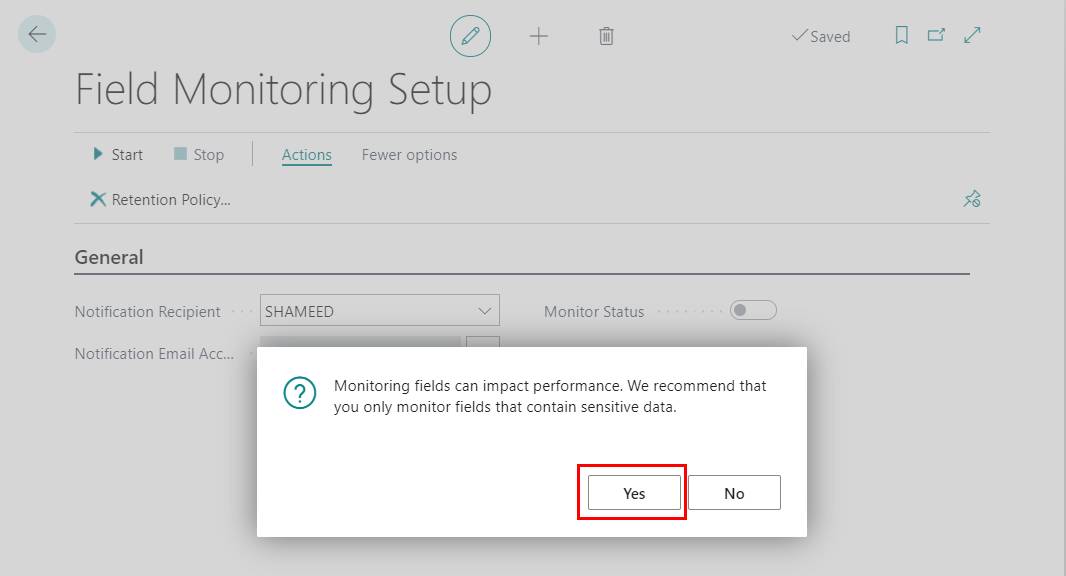
- Click Yes to confirm. This will enable the notification function.

- After clicking Yes, make sure that the “Monitor Status” Boolean is enabled.

- Now, go back to the search box and type “monitored fields” and select the Monitored Fields Worksheet function from the suggestions.

- On the Monitored Fields Worksheet page, click on the edit assist button (…) on the Table No. field to see the list of tables.

- On the Object page, search for “customer” and select the Customer table (ID 18) and click OK.

- Now click on the edit assist button (…) on the Field No. field to see the available fields.

- Select the field “Name” and click OK.

- Check the “Notify” Boolean.

- Repeat the same steps to add the Credit Limit as well.

- That’s it. To test, go to the Customer Card and change the “Name” and the “Credit Limit” fields. Close the page.

- You should receive the following email notifications:

The ability to monitor and track changes made to important fields in Dynamics 365 Business Central can be very useful in situations where you need to be notified of changes and to ensure changes are not being made without your knowledge.
Follow our blog for more support and how-to tips and articles for Business Central.


