In this demonstration, we are going to show you how to easily create a workflow using a template in Business Central. Workflows can be used to streamline and add controls to selected business processes. Workflows can be set up with multiple conditions and approval hierarchies. Coupled with the attachment feature, the automated workflows can eliminate the need to keep paper trails and retain audit trails within the system itself. Thus, making the process faster and efficient. In this blog, we will see how to create a Purchase Order approval workflow.
Setup the Users Who Are Involved in the Approval Process
Go to Approval User Setup.

Select all the users who are involved in the approval process.
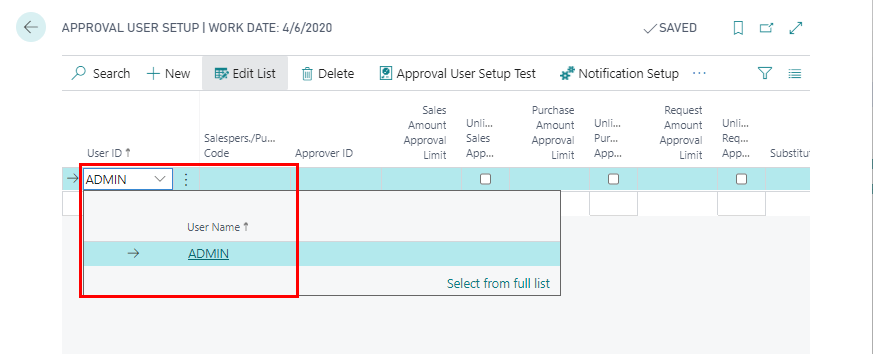
Enter the email address.

Note: You can also specify Approval Hierarchy and limits on this page, if you’re planning to use the “Approver Chain” method for approvals.
Setup Notifications
Go to Notification Setup.

Set the Notification type to Approval and Notification Method to Email. You can choose to set up a schedule for periodic notification or set it to “Instantly” to notify immediately.

Configure the Workflow Using the Template
Go to Workflows
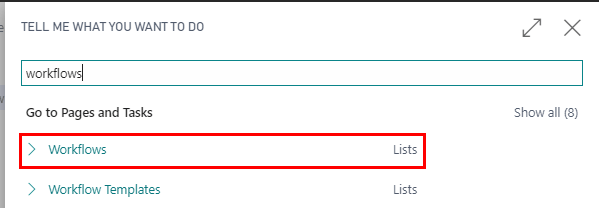
On the Workflows page click on New-> New Workflow from Template.

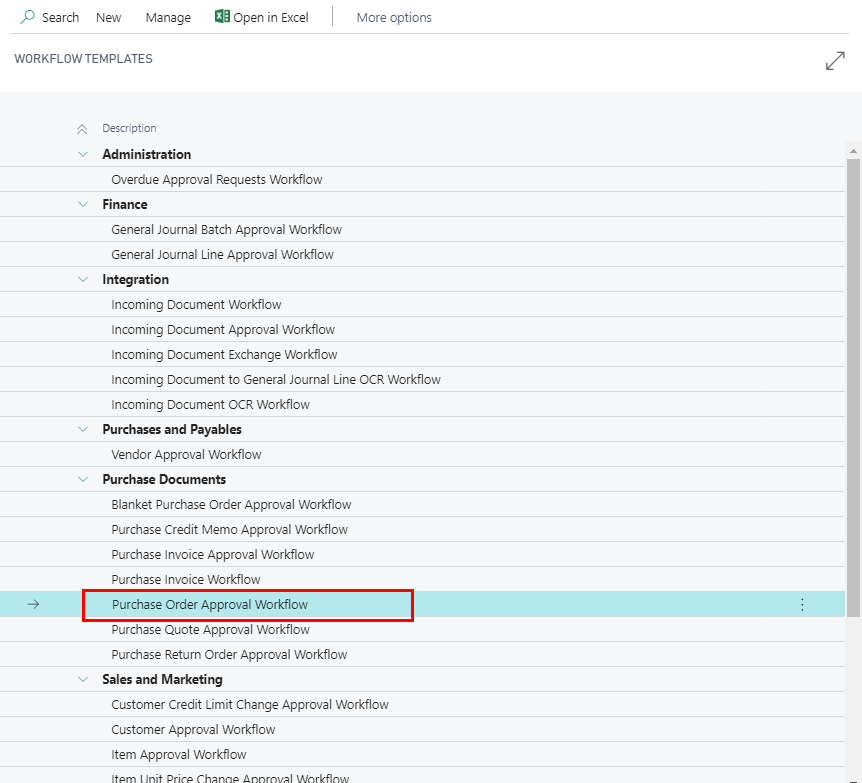
From the list of templates select “Purchase Order Approval Workflow” and click OK.
On the Workflow page, click on “On Condition” field of the event “Approval of purchase document is requested”
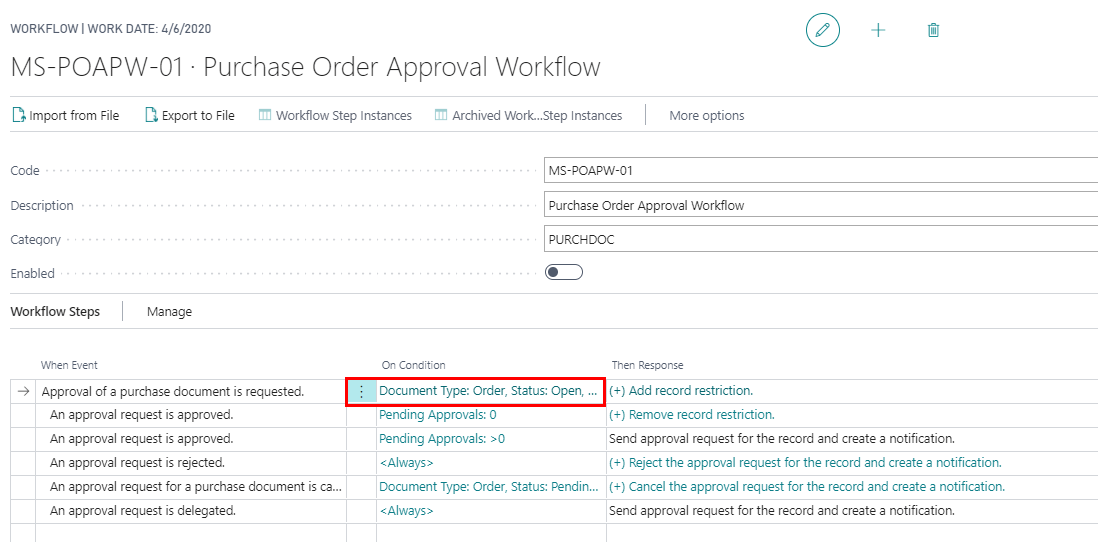
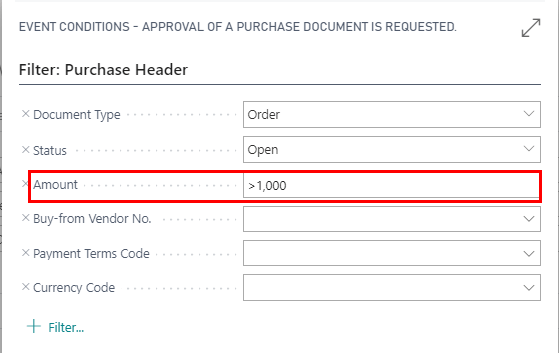
On the Event Conditions page specify the conditions to trigger this workflow. Multiple parameters can be used to specify the conditions. In this example, the conditions are Document Type = Order, Status = Open, and the Amount >1000.
However, if you have multiple conditions of the same parameter, then different workflows need to be created. E.g. the condition for this workflow is Amount > 1000. If the approvals are different for Amount < 1000, then it needs to be set up as a separate workflow.
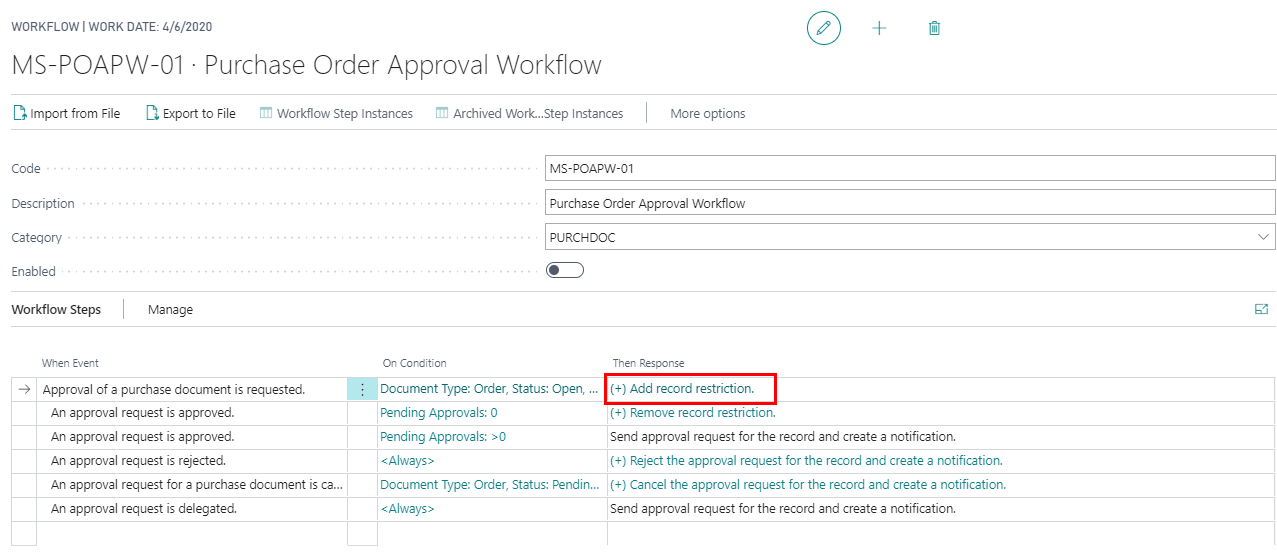
Click on the “Then Response Field” to set up the approvals.
Select the line “Create an approval request………………….” And specify the following fields.
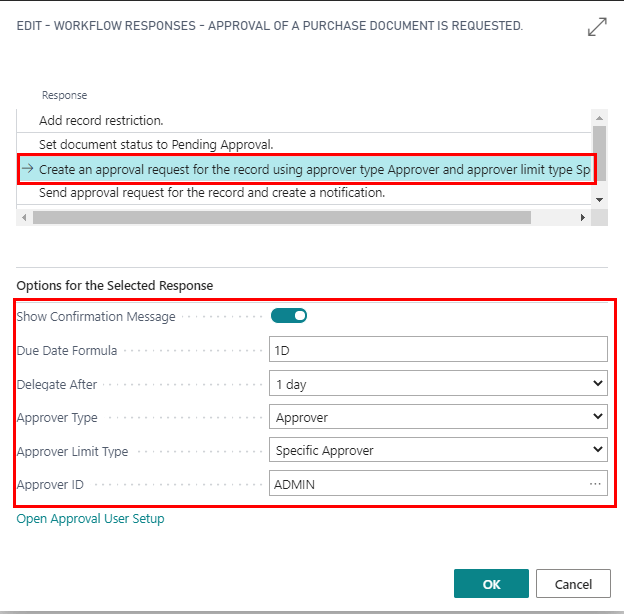
Enable “Show Confirmation Message”
Enter a “Due Date Formula”
Specify the “Delegate After” time period. The Options are:
- Never
- 1 Day
- 2 Days
- 5 Days
Select the Approver Type. The options are:
- Salesperson/Purchaser: The user who is set up in the Salesperson./Purch. Code field for the requester is selected as the Approver
- Approver: The user who is set up in the Approver ID field for the requester is selected as the Approver
- Workflow User Group: The approver is determined from the Workflow User Group.
Select the Approver Limit Type. The options are:
- Specific Approver: If this option is selected, then the approver needs to be specified on the Approver ID field below.
- Approver Chain: The approval request entries are created for all the requester’s approvers up to and including the first qualified approver.
- Direct Approver: An approval request entry is only created for the requester’s immediate approver, regardless of the approver’s approval limit.
- First Qualified Approver: An approval request entry is only created for the requester’s first qualified approver
Specify an Approver Id if the option Specific Approver is selected above.
In this example, we would set up Approver Type to Approver and Approver Limit Type to Specific Approver
Click on the value “(+) Remove Record Restriction”
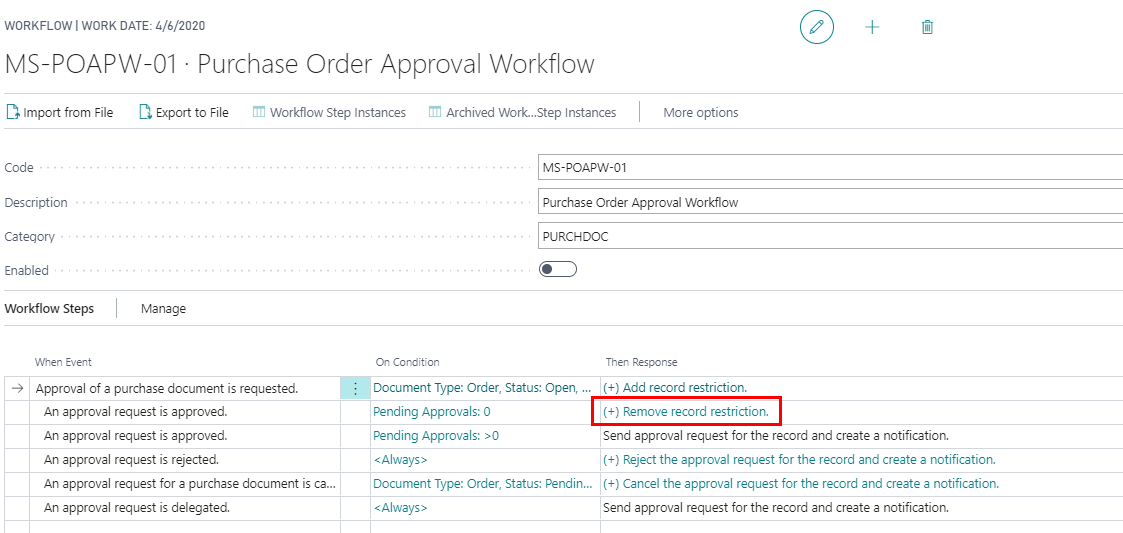
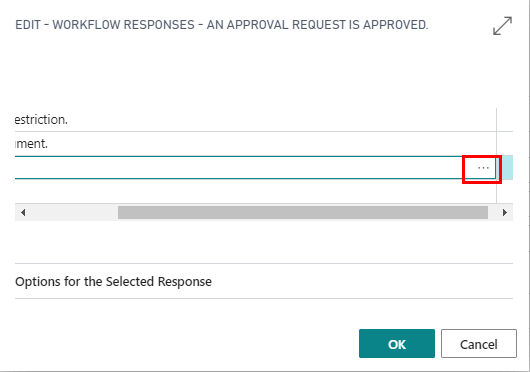
Click on the assist button to select new workflow responses.
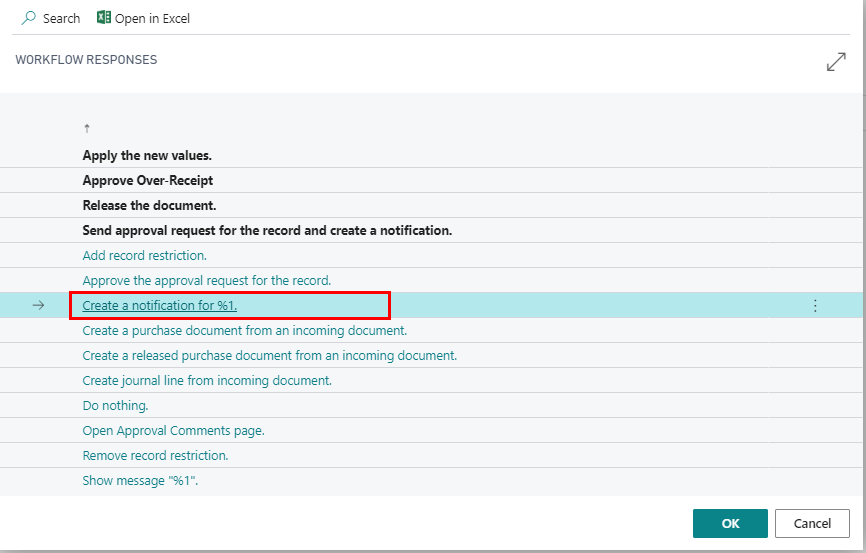
Select “Create a notification for %” and click OK.
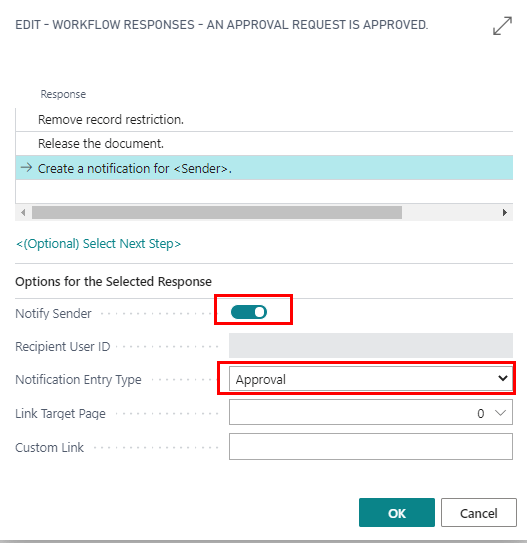
Enable Notify Sender and set Notification Entry Type to Approval and click OK.
Finally, enable the Workflow.
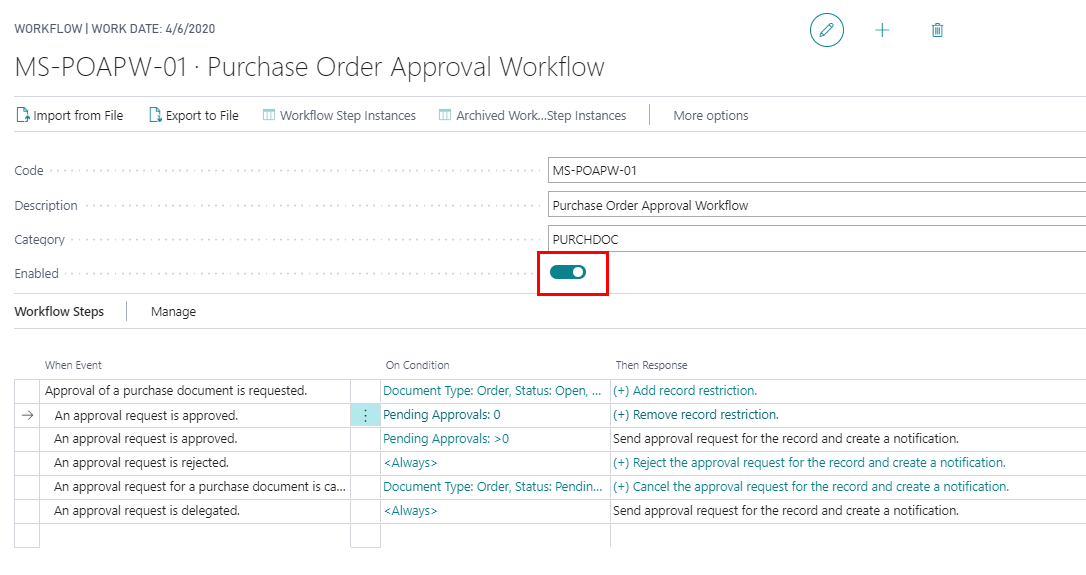
With the above steps, you should be able to easily set up a simple Purchase Order workflow. More complex workflows can also be set us using multiple criteria. Feel free to reach out to us if you have any further questions or need our assistance to evaluate your requirements.

